FINALLY!!! Finally I get around to posting this DIY of mine. And FINALLY I have a floral headband of my own! Where did you guys find yours? It is seriously so hard to find pretty floral headbands anywhere. Then I set my mind on buying some supplies to make my own, but it turned out to be just as hard a quest to find silk flowers anywhere nowadays! I’m still on the lookout though, as I want a more subtle version of the one I’m wearing here. More appropriate for every day wear. My boyfriend and I were getting ready to go out, and he asked me “you’re not going to wear THAT, are you?” so to spare him, I ended up taking the headband off because yes, maybe it was a bit much for grocery shopping. So I need a more subtle one for running my errands!
Ok, for the DIY: I warned you several times beforehand that it really is the cheat’s DIY, not much DIY to do at all! So this oner’s for all the lazy people out there.
All you have to BUY:
headbands with flower appliqué, as realistic as possible. You’ll have to see for yourself how many headbands you’ll need as it depends on how large the flower appliqué is. I chose to get 3 of the H&M flower headbands I used.
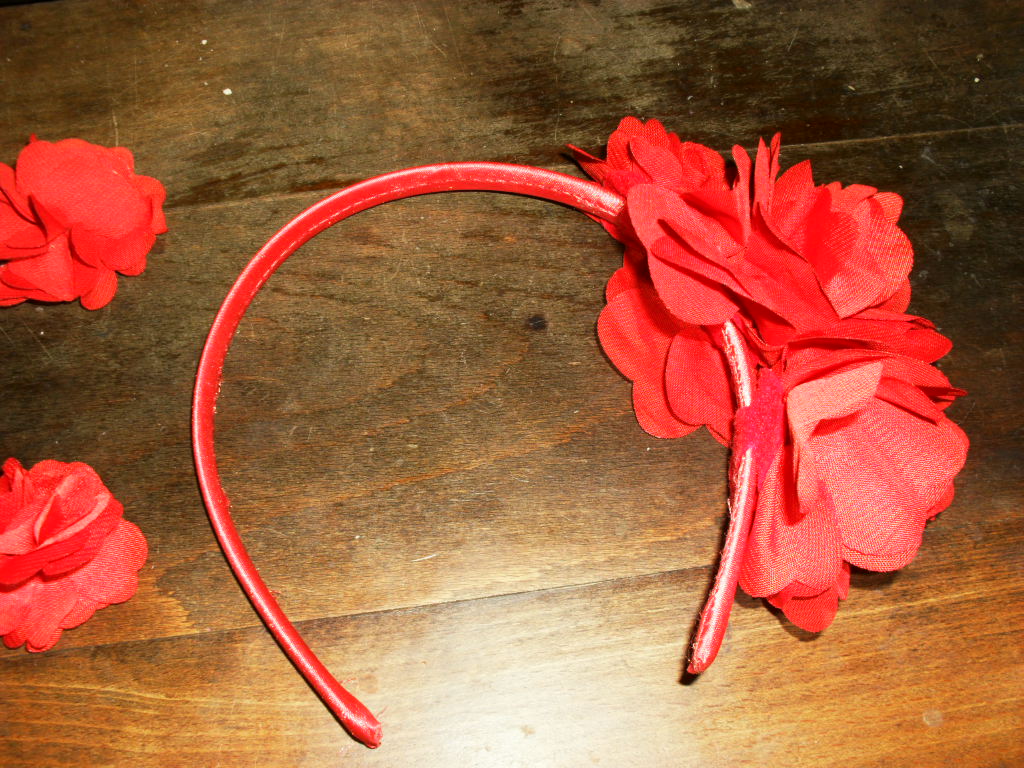
This is one of them, virginal and untouched. Next to it, you see a bit of the flower appliqué I took off the other headbands. Which brings me to the start of the real DIY:
All you have to DO:
- take a good look at how the flowers are attached to the headband. Usually they are glued on, and usually it is pretty easy to just pull the flower off the headband without damaging it. If the glue is too sticky, use scissors to seperate headband from glue, but refrain from cutting into the base flower as it may damage it. My headbands had this small piece of felt that fastened the flowers to the headband through a small loop you could slide off of the headband using little force.

If you’d want your floral headband to be versatile, you could always create these loops yourself and attach them to the flowers so you’d be able to put them on and take them off of the headband whenever you wanted. The loop basically consists of a round piece of fabric that has to slits cut into it which creates a hole if you lift up the piece of fabric in between the slits, easy enough to make yourself and glue onto the flowers!
- separate flowers from headbands (except for the flowers on the headband you’ll use as your base)
- attach flowers from additional headbands to base headband using glue/felt loop/needle and thread
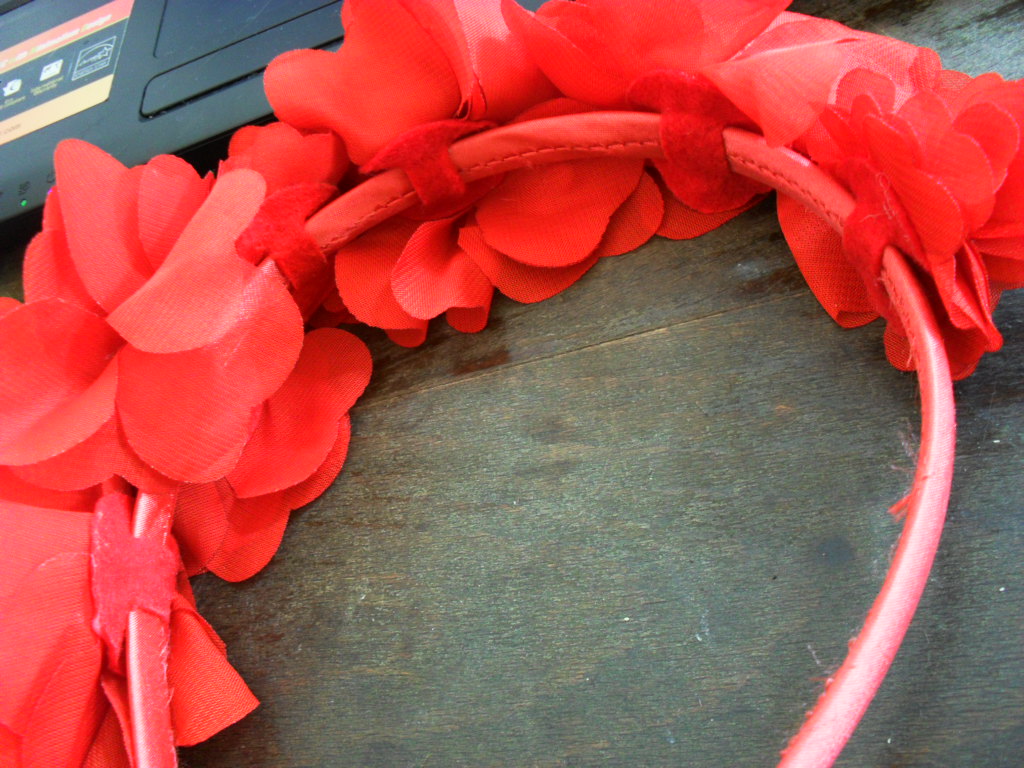
et voila!
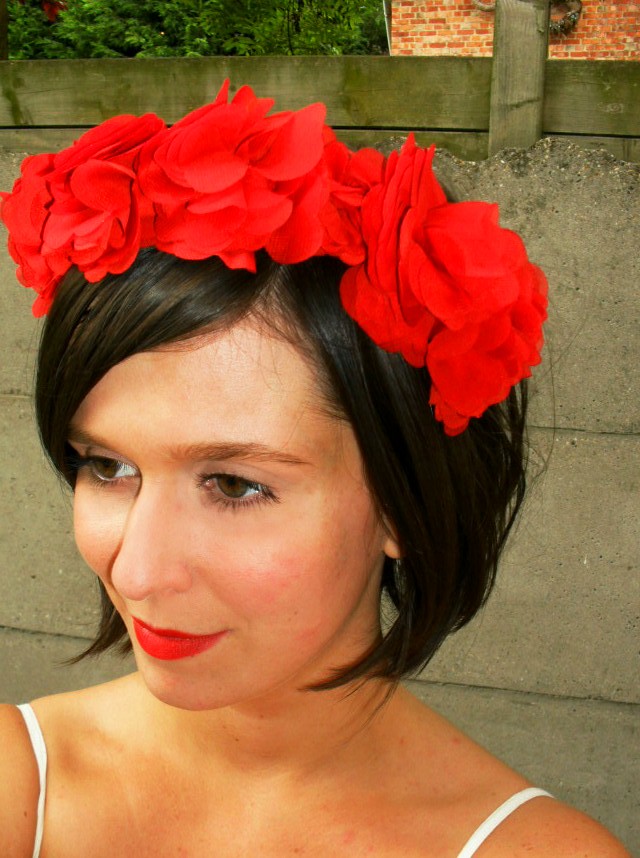
My headband cost me 7.50 euro, which I think is pretty cheap. I only used three H&M headbands as they all had quite a lot of flower appliqué, and I made a very full crown. You could also make a crown with smaller flowers or make it less full, it’s all up to you! Also, my headband doesn’t go all the way around, it’s more like a floral tiara. But I prefer it that way as I’m not a fan of the poof of hair that is created by a headband that goes all the way around your head. I wear it tilted slightly towards my forehead to create the headband effect. If you prefer a “real” headband you could always take off all the flowers and glue/sew them on to the ribbon and tie the ribbon around your head. The flowers on my headband would be quite easy to make yourself actually if you had the time and some suitable fabric. They consist of layers of thin flowers piled on top of each other and fastened in the “heart” of the flower. You could just cut out lots of flowers out of some very thin fabric and pile them on top of each other to create the same effect, and glue them on some basic headband or ribbon you have lying around there!
Tell me what you think of my first DIY and what you’d like to see differently! And be sure to show me your own results!
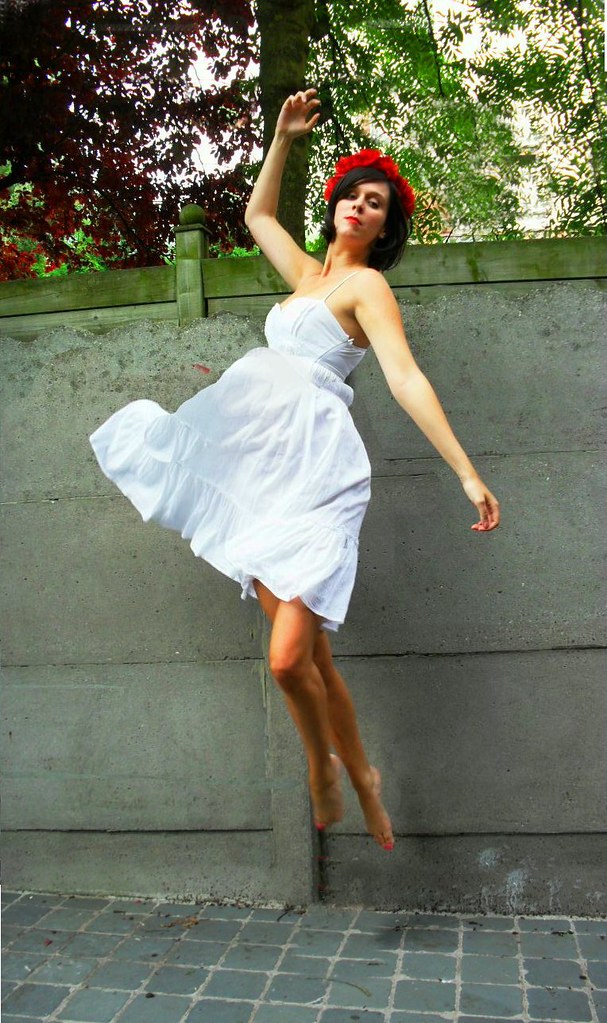
And here's some extra pics of me skipping about, basically looking drunk or like an undead zombie bride.


headband: DIY H&M
dress: pimkie
bare feet: model's own
bare feet: model's own


i want the feet!
ReplyDeleteheadband's as beautiful as it is unwearable to go grocery shopping (if you care for that matter). but you could wear it on a special occasion or in a (maybe, not sure) more subtle color on your marriage :D nice job sis
I'd wear it in this color for my wedding too :D and I'd wear it for grocery shopping if it was a teeny bit smaller :D
ReplyDeleteGreat DIY. That headband is so cute. Love your photos today. Check out my blog doing a contest!!!
ReplyDeleteJackie
www.styleforecasts.com
These photos are extra lovely! And I love the DIY, simple or not, it looks super cute.
ReplyDeletewonderfuuuuuul!!!!! <3
ReplyDeletexoxo
http://whatareyoulookingat-ninasafada.blogspot.com/
Mooi die witte jurk!
ReplyDeleteXoxo Birgitte
http://fashionaccordingtobirgitte.blogspot.com