If you know me, you know I'm a staunch defender of all things Kardashian. And yes, that includes Kontouring. Contouring existed before the Kardashians rose to fame, of course, but it goes without saying that Kim and her kin (lulz) are responsible for regular citizens even contemplating drawing shade and light onto their faces. Contouring is a serious make up artist technique that has bled into the mainstream, which is something I am very grateful for.
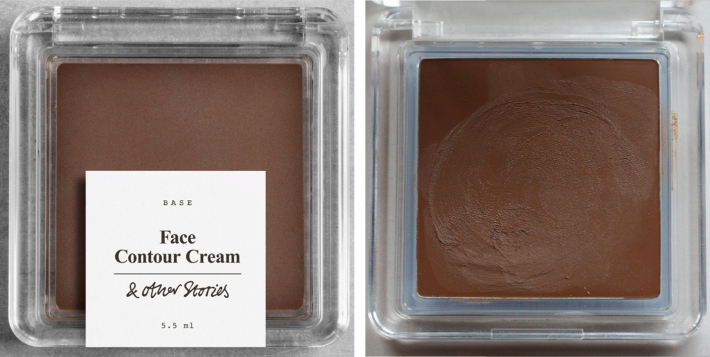
After discovering contouring with powder this summer, I wanted to take my make up game to the next level by moving on to contouring cream, which is supposed to give a more natural result as well as allow you to work more accurately. Last week, I picked up & Other Stories' Face Contour Cream, which is a cool toned brown cream that costs 12€. Let me show you how I use it and what it does.
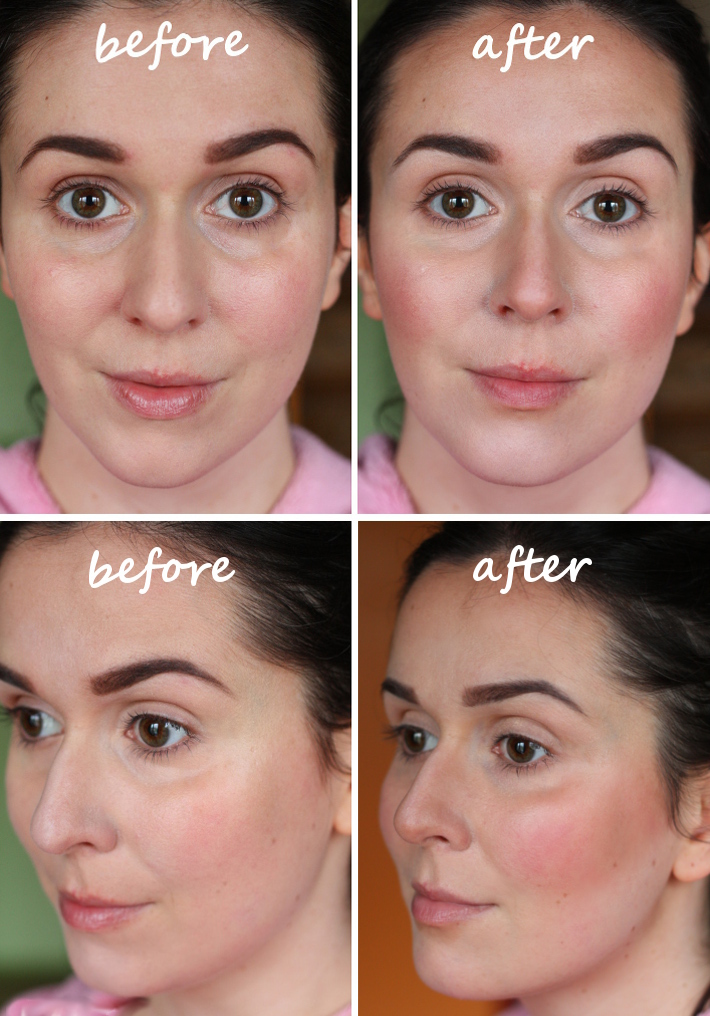
Ah, that elusive glow that comes only from afternoons in the sun, drinking wine while laughing with friends or, you guessed it, contouring. I get pretty pale during winter time, and contouring seems to give my winter skin summer radiance without taking away my natural colour. Pretty lovely result, isn't it? And actually very easy to achieve.
First, you need a neutral or cool toned contouring cream. Cool toned because the natural shadows in our face aren't orange-brown, but grey-brown. The cooler the contouring product, the more natural the end result. And I'd advise a cream formula because yes, it is easier to work with in various ways: more accurate, easier to build depending on whether you want a starker or a more subtle effect, and less likely to look cakey when layered on liquid foundation.
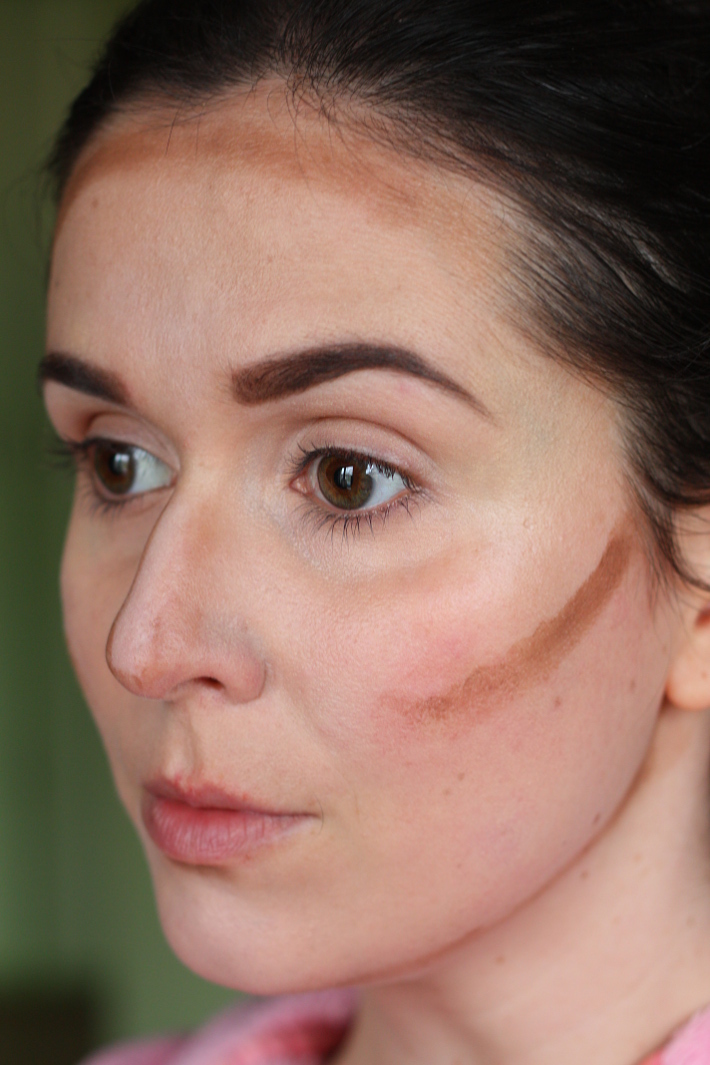
This is the pattern in which I apply contouring cream: along the top of the forehead (for glow and to minimize the forehead), along the bridge of the nose (straightens my nose), on the bottom of the cheekbones (to emphasize them, and applying the product higher is better than lower because it lifts the face), along the jawline (also to emphasize), finishing with a dab under my lower lip (to make it look fuller).
I basically just rub a finger or two in the contouring cream and swipe it where it needs to be, using only a small amount on the nose because otherwise the effect becomes too artificial. After putting the contouring cream where it needs to be, I use my fingers to blend it in. Always make an outward blending motion, away from the center of the face. The & Other Stories contouring cream is very easy to use, I love it.
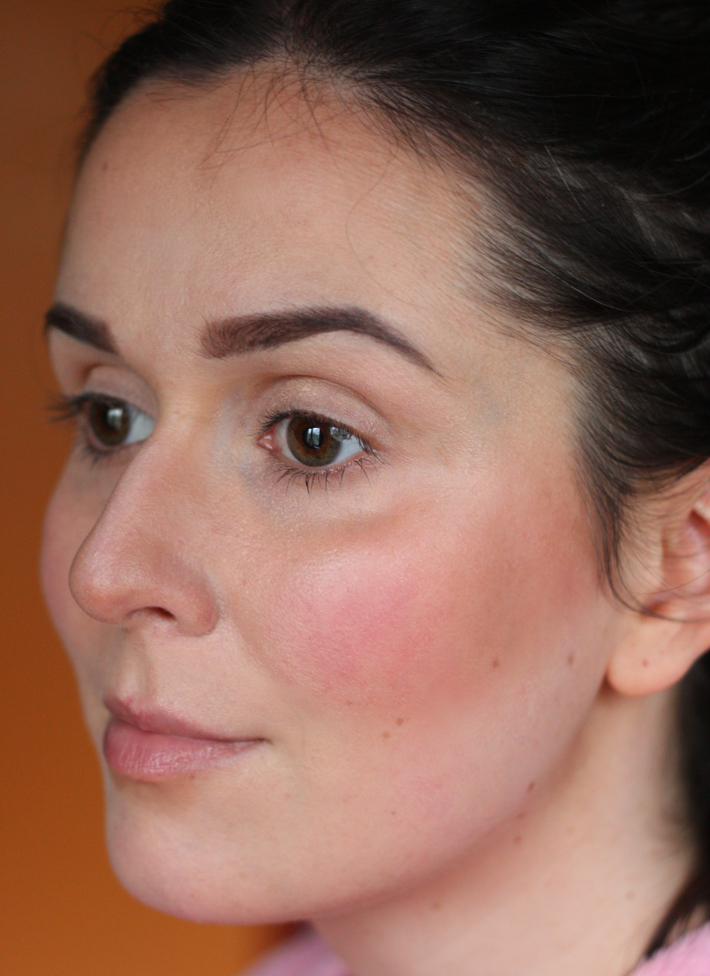
This is the end result, including blush and highlighting powder (along the top of my cheekbones). As always, we zoom out to get a better look at the effect.
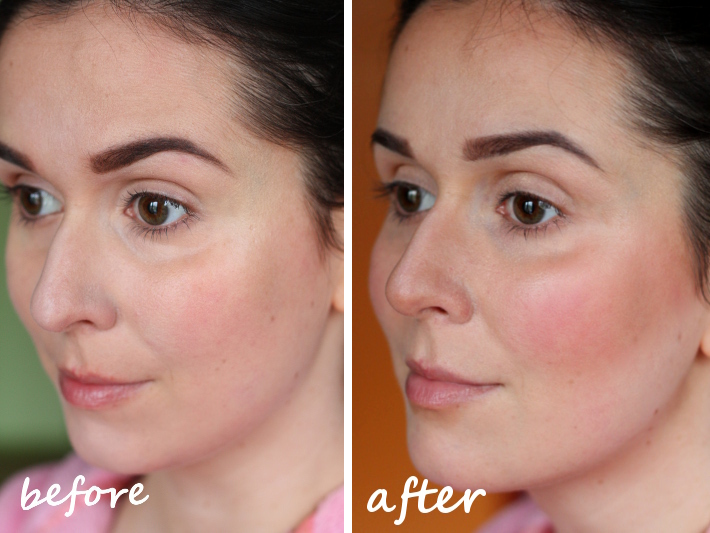
Voila! A big change, but I still think the effect is very wearable and natural. Of course, you can blend more for a lighter effect, but I'm a fan of the glam-made up look popularized by Kim K. My blush application was a bit whack this day (should have been higher), so ignore that.
Hope you like it, and let me know if you have any questions.



Heel mooi en natuurlijk resultaat. Ben wel fan van de make-up van & other stories, dus misschien probeer ik deze wel eens.
ReplyDeleteIk heb ook eigenlijk alleen maar goeie ervaringen met hun make up, en de prijzen zijn nog heel okey!
ReplyDeleteWauw, mooi effect!
ReplyDeleteJij maakt mij zo nieuwsgierig naar die contouring, ik wil uw gezicht nog eens in het echt zien joh :D
ReplyDeleteNaomi, x
Haha de vorige keren dat je me zag had ik ook al contouring! Ik doe het elke dag, valt helemaal niet op tenzij je voor en na close ups ziet. Kan het aanraden! :D
ReplyDeleteJa maar nu met de donkere crème versie dan :D Ik ben er ook ingevlogen, bijgewerkte wenkbrauwen en shit. You should be proud ;)
ReplyDeleteAh young padawan, i taught you well! :D
ReplyDeleteHi, i really enjoy all of your beauty reviews! Just bought the vitalumiere aqua because of you!! But here's a little tip i learned from make-up artist lisa eldridge (the one who does make up for keira knightley, kate winslet, alexa chung and even kim kardashian recently. She also has the best video tutorials, way better than even Charlotte tilbury's to my opinion): contour should be applied to the hollow of your cheekbones (suck in your cheecks so you know where that is) and then go higher up to the temples like you do, because that is where shadow falls. You blush should be above that, on the apples of the cheecks and the contour underneath them and then blend blend blend and blend the contour upwards towards your temples. when you apply it higher on your cheekbones it looks like a dark blush (but even that looks pretty on you!) rather than shadow that slimlines your face... Keep going with these reviews, they are really helpful!!!
ReplyDeleteHi M, thanks for the tip (and i hope you adore chanel VA as much as I do)! I agree that the application along the cheekbones could be better here, the placement of the blush doesn't help either (too low). The main issue was that I applied too much product so I could show the effect clearly in the pictures, as make up doesn't always show up the same way on camera as it does in real life. I can't put it on too low either though, or it drags my face down and makes it appear fuller rather than more defined. I'll definitely keep playing with it, make up is always a learning process! And i loooove lisa eldridge :)
ReplyDeleteI actually went back and added new pictures that have better contouring/blush application, it works better now, doesn't it?
ReplyDelete